Clawed Guides & Walkthroughs
Everything you need to survive Prehistoria - from your first spawn on the pier to late-game dinosaur fights.
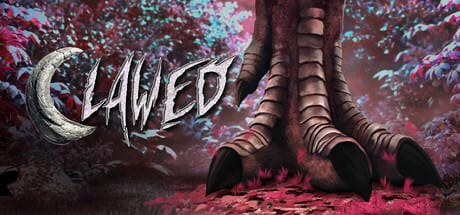
Clawed by Flatrock Games drops you into Prehistoria, a decaying dinosaur theme park where scavenging, puzzle-solving, and gunfights decide whether your covert team extracts alive. Whether you are sampling the free Steam demo or preparing for the August 13, 2026 launch, this hub collects every guide on clawedgame.wiki so you spend less time lost and more time progressing.
Online co-op supports up to four players in most modes, and the demo alone offers several hours of exploration across the pier, monorail station, main square, museum, underwater tunnels, and more. Use the pages below as a roadmap - each guide cross-links related topics so you can jump between mechanics, items, and threats without hunting through forums.
Start here
New to Prehistoria? Begin with Getting Started for a day-one overview: where to find the pistol on the pier, why the access card in the first shelter matters, and how red lights guide you through flooded maintenance tunnels. That page also points to the Demo Checklist and full Walkthrough when you want step-by-step key locations.
Before you queue with friends, skim Controls for keyboard, mouse, and controller layouts - including the first-person and third-person camera toggle - and confirm your PC meets System Requirements so underwater sections and Unreal Engine 5 environments stay smooth.
Core guides
| Guide | What it covers |
|---|---|
| Getting Started | First hour, demo essentials, co-op onboarding |
| Controls | PC and gamepad bindings, camera modes, swimming |
| System Requirements | Steam minimum and recommended specs |
| Game Modes | Classic, Survival, and Tourism compared |
| Combat & Dinosaurs | Raptors, Spinosaurus, Deinosuchus tactics |
| Weapons & Items | Every gun, key, card, and tool in the demo |
| Review | Preview verdict, modes, and demo scope before launch |
Demo progression at a glance
The Steam demo teaches Clawed’s loop through item gates and environmental puzzles rather than hand-holding cutscenes. Early priorities that appear across multiple guides:
- Pier spawn - Grab the pistol and ammunition before leaving the arrival area.
- First shelter - Pick up the main gate access card.
- Main square - Museum key in the staff center; fossil in the toilet block on the left after the gate.
- Museum - Place the fossil on the glowing red light to reach the South Terminal key.
- Underwater tunnels - Follow red lights, press each button, and keep moving until you surface dry.
These beats are expanded in Getting Started and the dedicated walkthrough pages. If a gate will not open, you are usually missing a key from the previous zone - backtrack rather than brute-forcing combat.
Choose your mode
Game Modes explains when to play Classic (focused survival horror), Survival (hunger, thirst, weather, day/night cycle, random encounters), or Tourism (explore Prehistoria before the park fell). Classic is the best first run for learning layouts; Survival adds pressure once you know where keys spawn; Tourism suits players who want atmosphere without constant threat.
When fights go wrong
Prehistoria is not a power fantasy. Ammunition is limited, dinosaurs hit hard, and flanking raptors punish tunnel vision. Combat & Dinosaurs covers Utahraptor packs, Spinosaurus arena space, and Deinosuchus aquatic ambushes - including when shooting is smarter than sprinting.
Coordinate roles in co-op: one player watches rear corridors while another solves red-light button chains in flooded sections. Voice comms help, but even solo players benefit from the same habits - clear a room, loot quietly, then move.
Beyond guides
Pair these pages with Players for roster or character notes as the wiki grows, Updates for patch notes around the 2026 launch, and Tier List for weapon and threat rankings once the meta settles. Flatrock has expanded the demo repeatedly; if an item location shifts after an update, check Updates first, then the walkthrough child pages.
How to use this wiki
Guides are written for the English demo and launch build on Steam. Paths use trailing slashes and locale-agnostic links - the site generator localizes them for French, German, and Spanish when those translations land. Bookmark this hub and return after major patches; demo key locations and balance tweaks are the most common reason to refresh a guide.
If you only read one page before launching the demo, make it Getting Started. If you are returning after a break, jump straight to Demo Checklist for a collectible and key route without rereading the full tutorial prose.
Frequently Asked Questions
Quick answers to the most common questions.
Which Clawed guide should I read first?
Start with Getting Started for pier spawn, early weapons, and demo gates. Add Controls and System Requirements before your first co-op session.
Does the demo use the same maps as the full game?
The demo covers a large slice of Prehistoria - monorail arrival, main square, museum, tunnels, and more - but Flatrock may adjust layouts before August 2026 launch.
Are these guides written for solo or co-op?
Both. Puzzle steps and item locations work solo; co-op sections note splitting loot, covering angles, and reviving teammates where applicable.
Where is the full demo item checklist?
See Demo Checklist for every key, card, fossil, and weapon route. Getting Started summarizes the critical path if you want a shorter read.
Will Survival mode guides differ from Classic?
Yes. Game Modes explains extra systems like hunger and weather. Combat and exploration routes stay similar, but resource pressure changes pacing.